Ever wondered how to get your blog posts to look awesome when you share to social media.
Wrong headline?
Image missing?
Not happy with the description?
Let’s fix that now with these handy tips…
[bctt tweet=”How to get your blog posts to look awesome when you share to social media. #socialmedia” username=”feedalpha”]
When you create a blog post I would consider this the first step in the process of getting value out of the content.
Unless people know about you they will never read this content unless you tell them about it.
The quickest way to get people to notice it is to share it out on Social Media.
That may be to Twitter or Facebook, your LinkedIn account or Business page.
Wherever you share it you need to be able to control how it looks before you hit the share button.
If you are using WordPress then the easiest way to do this is use a plugin like Yoast. Most of you may be familiar with Yoast as its the one most users install for basic SEO tasks.
So let’s take a look at the latest post we just published and walk through the steps to get everything set up.
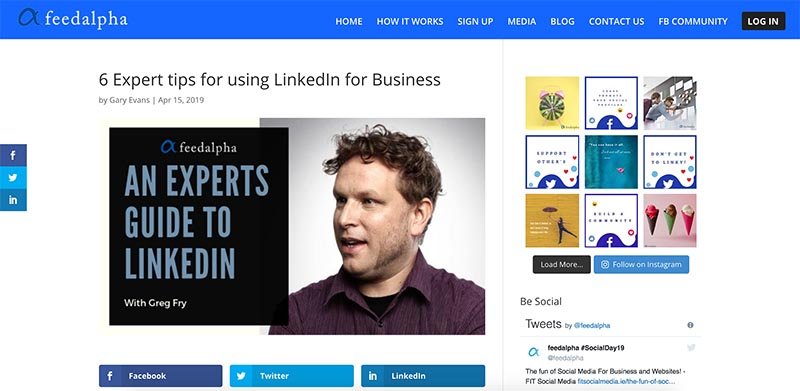
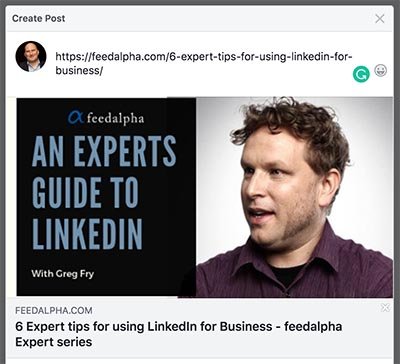
Above is a screenshot of the custom image we used to start the blog post. It is important to use something relevant because its the first thing people will see when you hit publish.
It’s also the image we want to use for our Social Media campaigns so make it stand out.
Social Media feeds are very noisy places so something that catches their eye and gives the user an idea of what your content is about works best.
Because this post is by LinkedIn expert Grey Fry we used a headshot and had a custom graphic made in Canva to make it pop.
Now you can use auto post plugins like social media auto post, that will automatically share your content out to each social media network but we like to control how everything looks first.
So what’s next?
Assign Featured Image
We have our featured image ready to go so now let’s add it into WordPress.
Within the post editor for WordPress scroll down to the bottom right of the screen and click add featured image.
Browse to your image and click insert. Wait a few seconds and boom, you have your image assigned to the post.
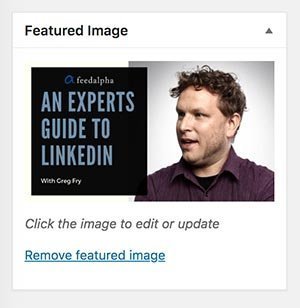
This is the default image that will follow the post around overtime somebody publishes the link anywhere.
Assign Different size images to suit Social Media.
The next step in the process is to get your image sizing right to suit each Social network.
Facebook post image sizes are 1200 x 628

Twitter post image sizes are 1024 x 512

Now that we have 2 new images set to the correct size we need to assign them to the post.
That’s where Yoast comes in.
If you scroll down to the bottom of your post you will see an information box with all the Yoast settings.

Click on the icon (1) and this brings you into the Social Media settings for the active post.
Click the small Facebook icon and then click ‘upload image’ (2). Browse to the image you sized for Facebook and click insert.
Click the Twitter icon and add in the correctly sized Twitter image.
Headline / Title and Description
While you are in the Yoast screen you can set different headlines for your Social Media shares.
Normally the default Page title will be used but now you have the opportunity to mix it up a bit to suit your audience…
Craft your title and add it to the Facebook / Twitter Title section.
For your descriptions, this is the block of text that shows up on your shared posts under the headline. Again you can customise this to suit each network.
Checking if everything looks right
Now that you have image, headline and description set for each network you should go check out how they actually look.
Checking Facebook
For sharing content on Facebook you can use their handy Facebook Debugger tool here for link previews.

First thing you need to do is copy and paste the link to your new post into the sharing debugger box provided.
The first time you run the tool you may get an error saying ‘This URL hasn’t been shared on Facebook before’.
![]()
That’s normal as its a new post.
Just hit the Fetch new information button and the tool will go scrape the page for the required info.
If everything is setup correctly on your blog post then you should start to see the right info flowing through.
If you make a change to the feature image on your site then hit click the scrape again button to refresh the info.
Tip: If you have a WordPress site and use a caching plugin you may need to clear your WordPress cache for that web page before your info updates.
First up is the image you set. Remember this can be set from the featured image box on the blog post or from within the Facebook tab in the Yoast plugin.
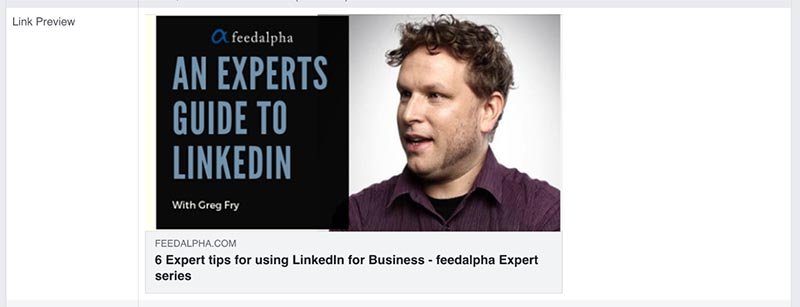
As part of this preview, you will also notice that the correct headline has been applied to the post – excellent.
Next, we want to check the description that will be published. For that, we scroll down the Debug page a bit and have a look.
![]()
This will show up beside the og:description
All looks good in the debug tool so that’s Facebook sharing covered.
Now when you share your update to Facebook you should see the right preview:
Checking Twitter
For Twitter we can use the Twitter Card validator tool – found here
This tool is very straightforward to use, allows you to attach rich content such as images and meta tags, and once you have the correct setting in Yoast it should work straight away.
Copy the URL from your published post and paste it into the Card URL box.
Hit the Preview Card button and after a few seconds, the info will appear.
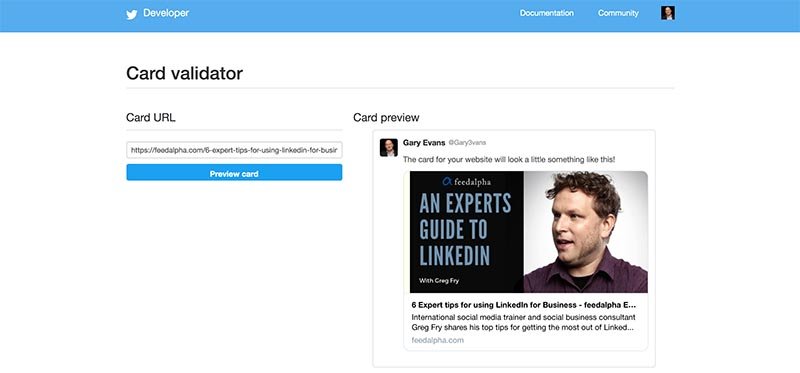
As you can see from the summary card with large image below, the correct image, headline and description are showing up so you are good to go.
If you use a third-party platform like feedalpha to publish your updates the app cards will all look perfect
Checking LinkedIn
For LinkedIn, we can use their handy tool call LinkedIn Post Inspector – found here
To check how everything looks, copy the URL of the published post and paste it into the box provided.
Hit the inspect button and after a few seconds, the information will appear.
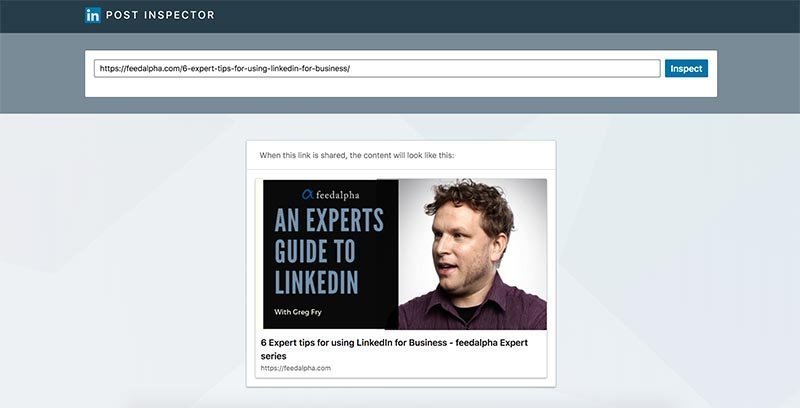
LinkedIn uses the standard Open Graph information you set in Yoast so once you have a featured image assigned to your post, the correct headline and description then it will work.
Wrapping Up…
Now that you have all your settings right you need to start sharing the blog posts out to each account.
Taking advantage of customising each headline and image to suit each network works really well.
Over to you now to get posting.
If you have any issues along the way just drop us a comment and we will help you out 🙂
Thanks
feedalpha